Overview
The Diary Resources section allows you to define and manage appointment locations or assets that need to be allocated to patient appointments. These resources appear as color-coded elements in your diary, making it easy to identify where appointments are taking place.
Understanding Resources
Resources might represent physical spaces or equipment in your practice, such as:
- Treatment rooms
- Specialized equipment
- Practitioner stations
- Assessment areas
Or they may be used for tracking patient flow through the practice. When you assign a patient to a specific resource, their appointment in the diary is color-coded accordingly, helping staff quickly identify which room or resource is being used.
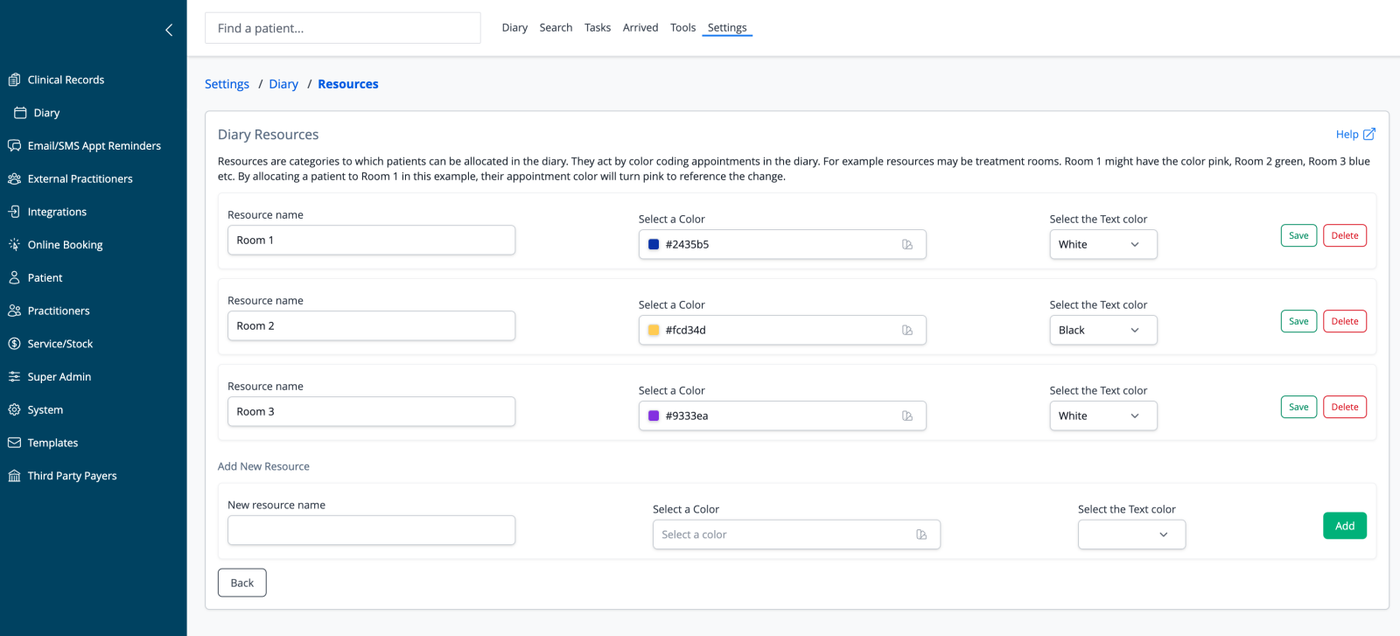
Managing Existing Resources
Each resource entry includes:
- Resource name: The identifier for the resource (e.g., "Room 1", "Room 2", "Room 3")
- Select a Color: The background color that will represent this resource in the diary
- Select the Text color: The color of the text that will appear on top of the background
For each resource, you can:
- Save: Update the resource after making changes
- Delete: Remove the resource from your system
Adding New Resources
To create a new resource:
- Scroll to the "Add New Resource" section
- Enter a name in the "New resource name" field
- Select a background color that will represent this resource in the diary
- Choose a text color that will be visible against your selected background
- Click the "Add" button to create the resource
Color Coding Logic
The color coding system provides visual organization to your diary:
- Each resource has a distinctive color (e.g., Room 1 is blue, Room 2 is yellow, Room 3 is purple)
- When a patient is assigned to a resource, their appointment displays in that resource's color
- This visual system helps practitioners and staff quickly identify where appointments are located
To return to the previous screen, click the "Back" button at the bottom of the page.