Overview
The Email Templates section allows practitioners to create, edit, and manage customized email templates for patient communications. These templates streamline communication for common scenarios like sending exercise instructions, therapy information, and clinical resources.
Accessing Email Templates
- Navigate to Settings in the top menu
- Select Templates from the sidebar menu
- Click on Email
Email Templates List
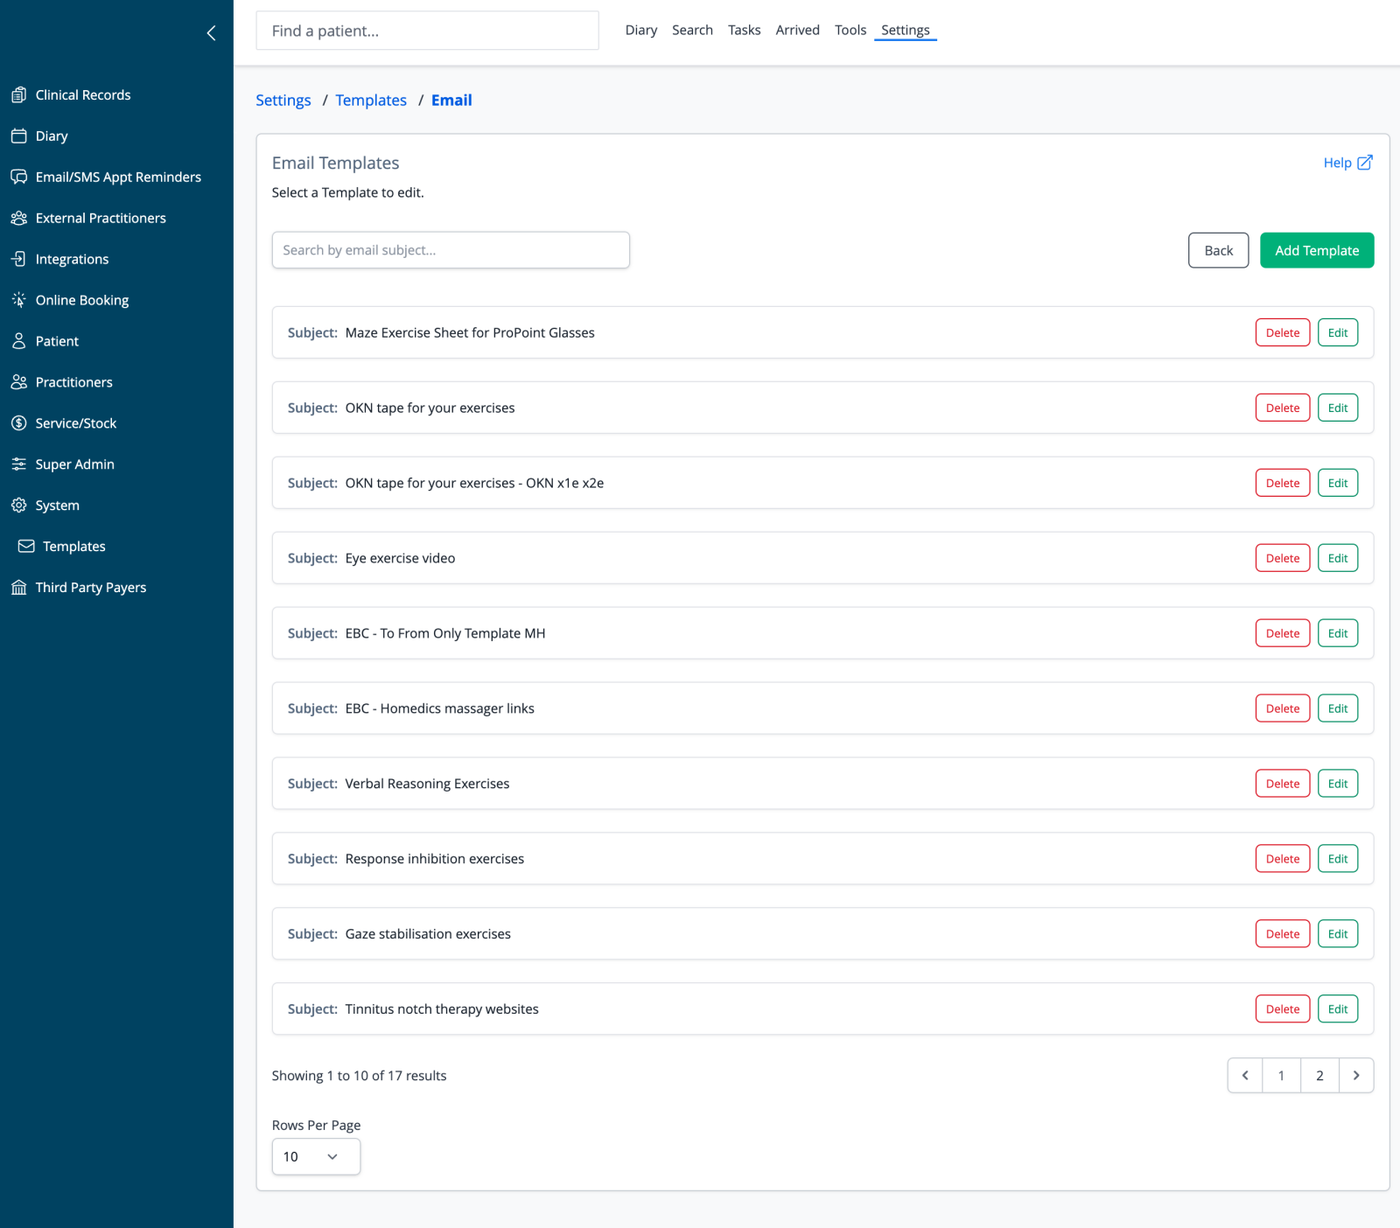
The main screen displays all available email templates:
- Each template shows its subject line
- Templates are listed in alphabetical order by subject
- Action buttons (Edit, Delete) appear to the right of each template
- Search functionality helps find specific templates
- Pagination controls appear at the bottom when there are multiple pages of templates
List Features
- Search: Filter templates by subject line or content
- Add Template: Create a new email template
- Back: Return to the previous screen
- Rows Per Page: Control how many templates display per page (default is 10)
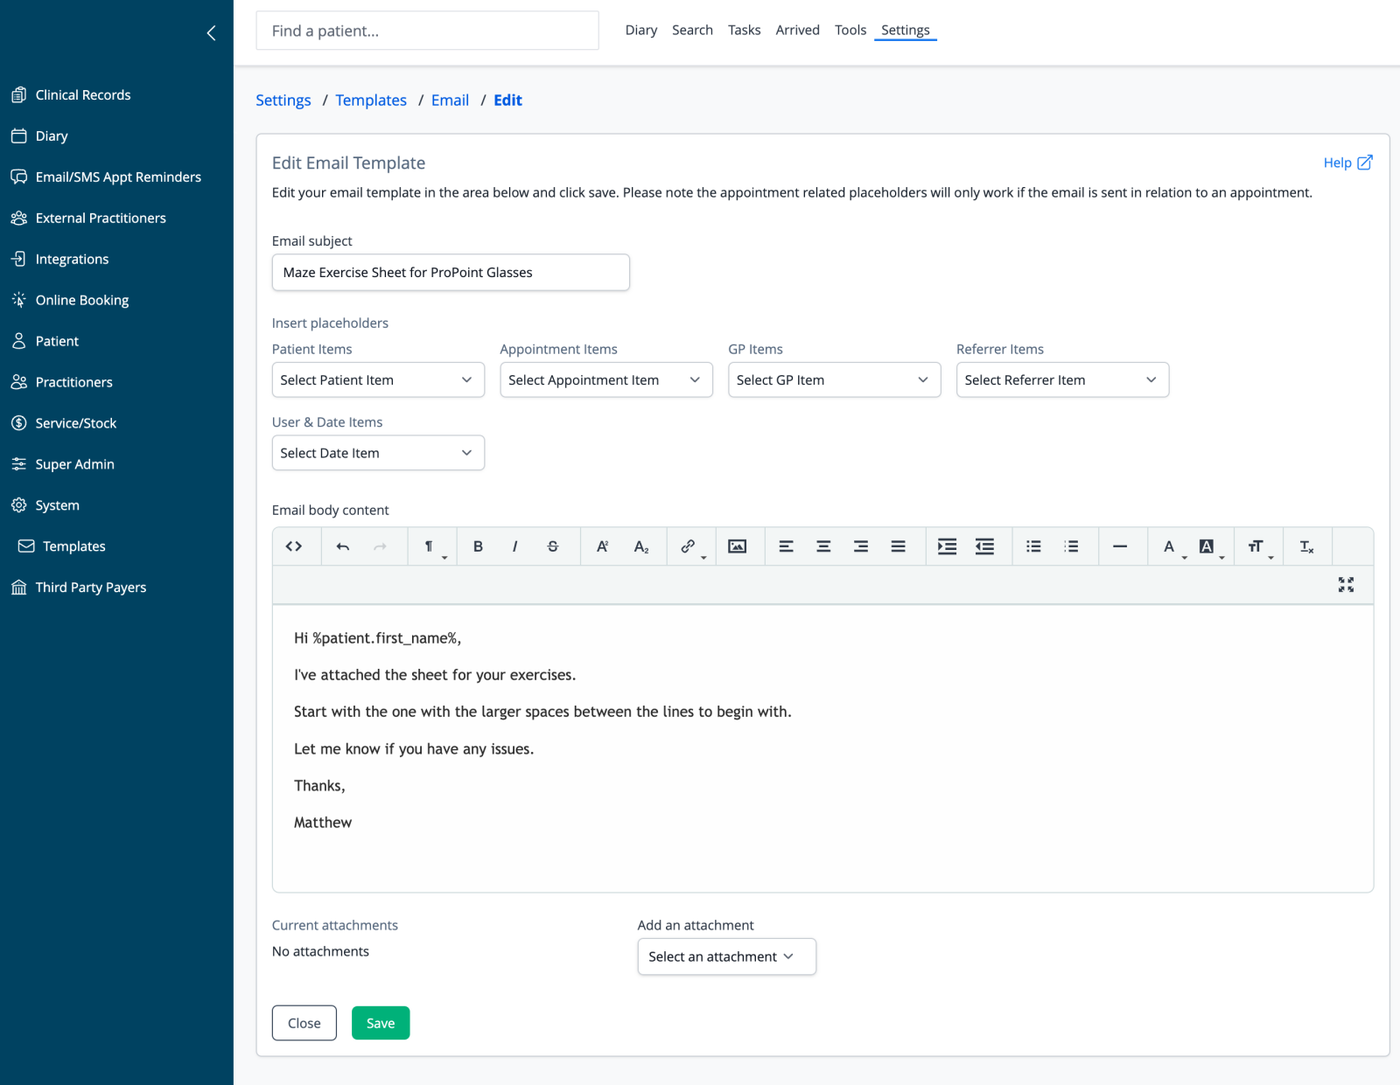
Adding a New Template
To create a new template, click the "Add Template" button. The template editor includes:
Email Subject
- Enter a descriptive subject line that will appear in the patient's inbox
- Use clear, specific titles that indicate the purpose of the email
Insert Placeholders
The system provides various placeholder categories that dynamically insert patient-specific information:
- Patient Items: Name, date of birth, contact details, etc.
- Appointment Items: Date, time, duration, type, etc.
- GP Items: Referring doctor information
- Referrer Items: Referral details and dates
- User & Date Items: System user and timestamp information
Each category has a dropdown menu of available placeholders.
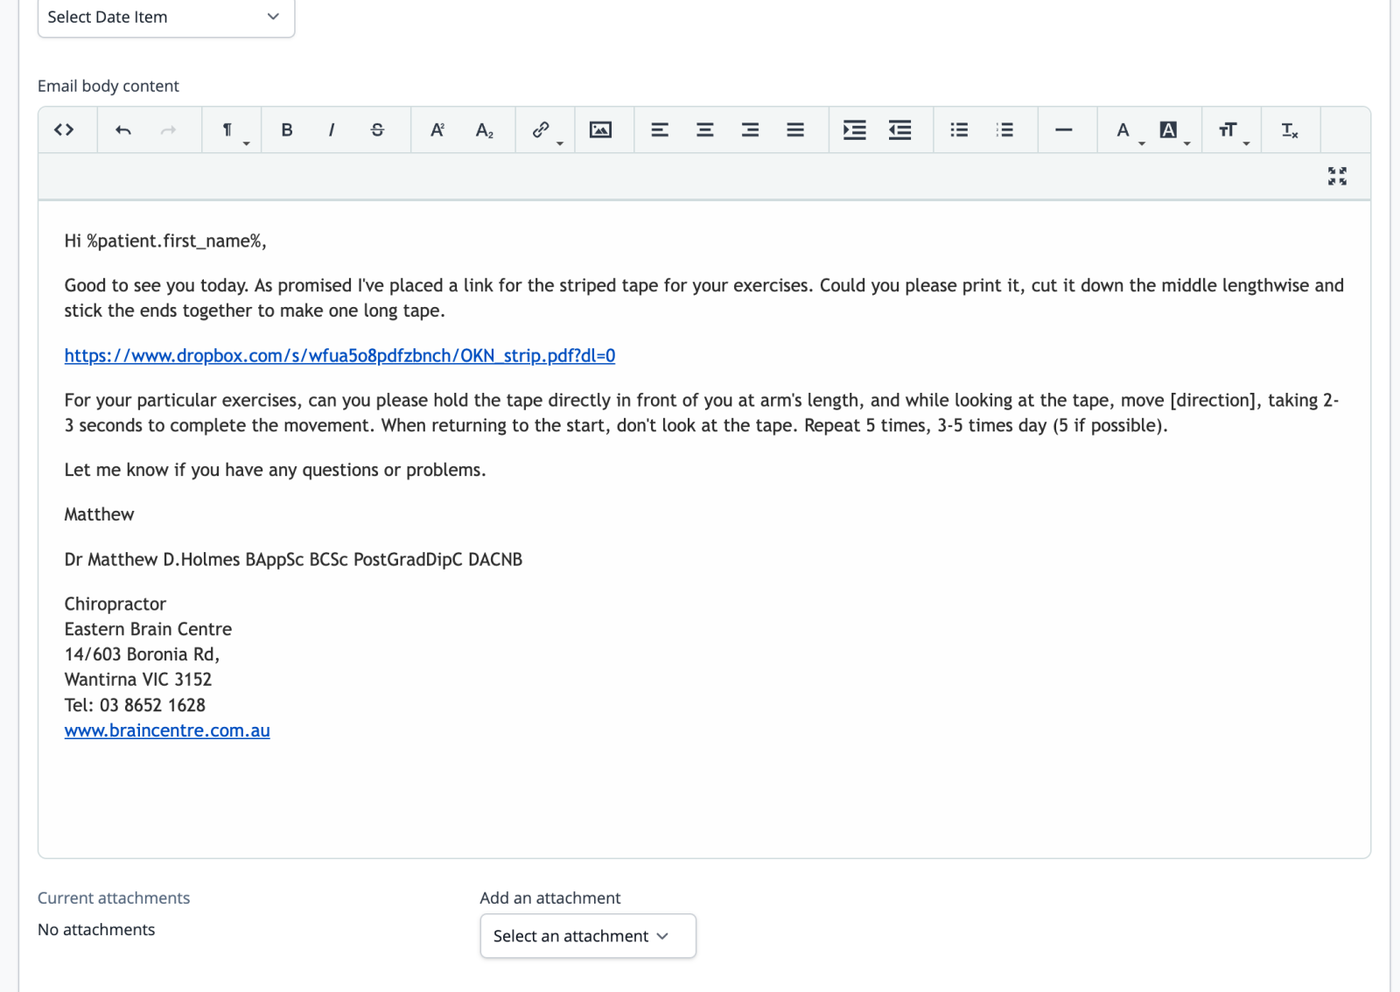
Email Body Content
- Rich text editor with formatting options:
- Text formatting (bold, italic, underline)
- Font size and type controls
- Alignment and list options
- Link insertion
- Image embedding
Using Placeholders
Placeholders appear in the format %category.field_name% and are automatically replaced with actual data when emails are sent:
%patient.first_name%- Patient's first name%appointment.date%- Appointment date%appointment.time%- Appointment time
Note: If the preferred name placeholder is used in a template, and the patient does not have a preferred name saved, the system will automatically insert the first name instead.
Attachments
- View current attachments associated with the template
- Add new attachments from a dropdown menu of previously uploaded files
- Attachments must be uploaded in the Email Attachments section before they can be selected here
Template Actions
- Save: Create the new template or update an existing one
- Close: Return to templates list without saving changes
Editing an Existing Template
To modify a template, click the "Edit" button next to its name. The editing form includes:
Email Subject
- Update the subject line as needed
- Consider version numbering for exercise instructions that may change over time
Email Content
- Modify the body text with the rich text editor
- Add or remove placeholders as needed
- Important: Note that appointment-related placeholders will only work if the email is sent in relation to an appointment
Attachments
- Add or remove file attachments
- Select from previously uploaded documents in the attachment library
Common Template Uses
- Exercise Instructions: Send specific rehabilitation exercises to patients
- Therapy Information: Provide details about treatment methods
- Educational Resources: Share health information and self-care instructions
Best Practices
- Create templates for frequently sent communications to save time
- Use a consistent tone and format across all templates
- Include your name and practice details at the end of each template
- Test templates before using them with patients
- Periodically review and update templates as protocols change
- Use specific subjects to help patients identify the purpose of the email
- Keep instructions clear and concise
- Consider creating separate templates for different practitioner styles or specialties
Navigation
- Close: Return to templates list without saving changes
- Save: Update and save template changes
Fixing Broken Templates from the System Interface Update
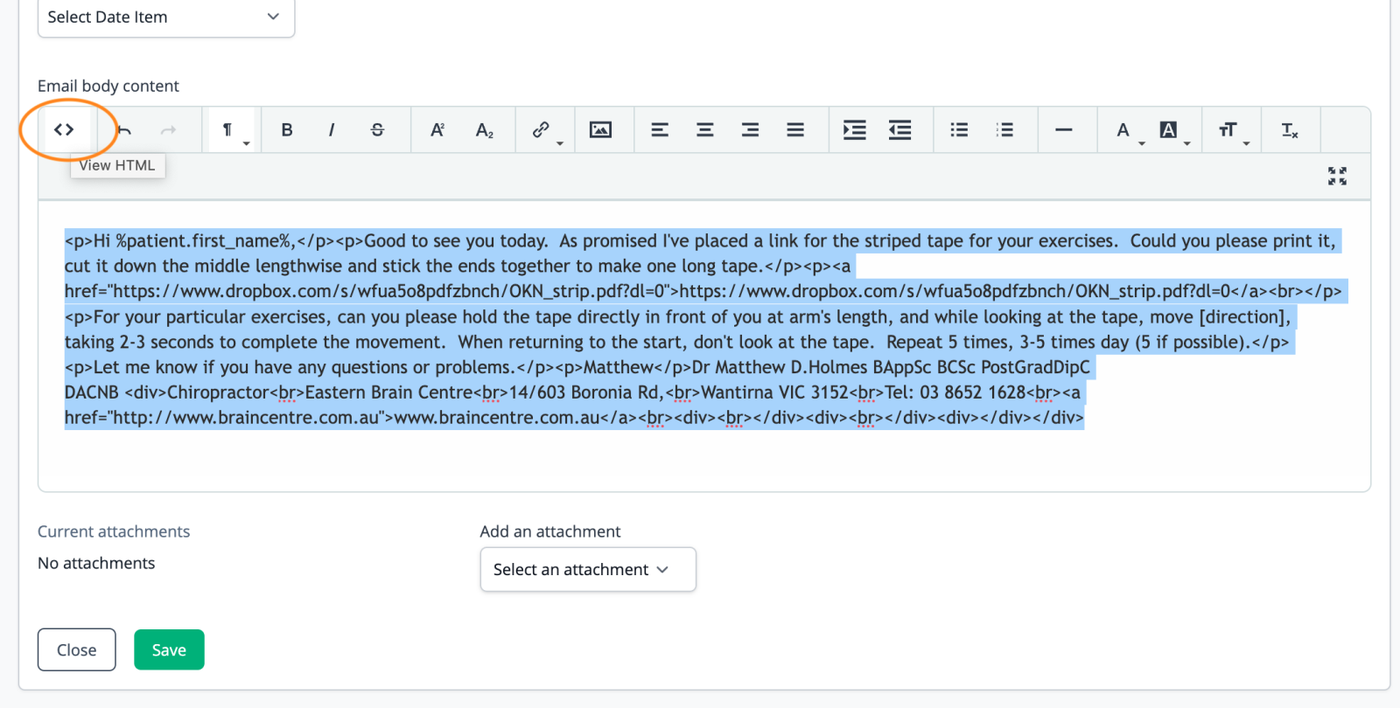
If your existing templates look something like this following the transfer to the new system interface, then follow these steps to rectify the problem.
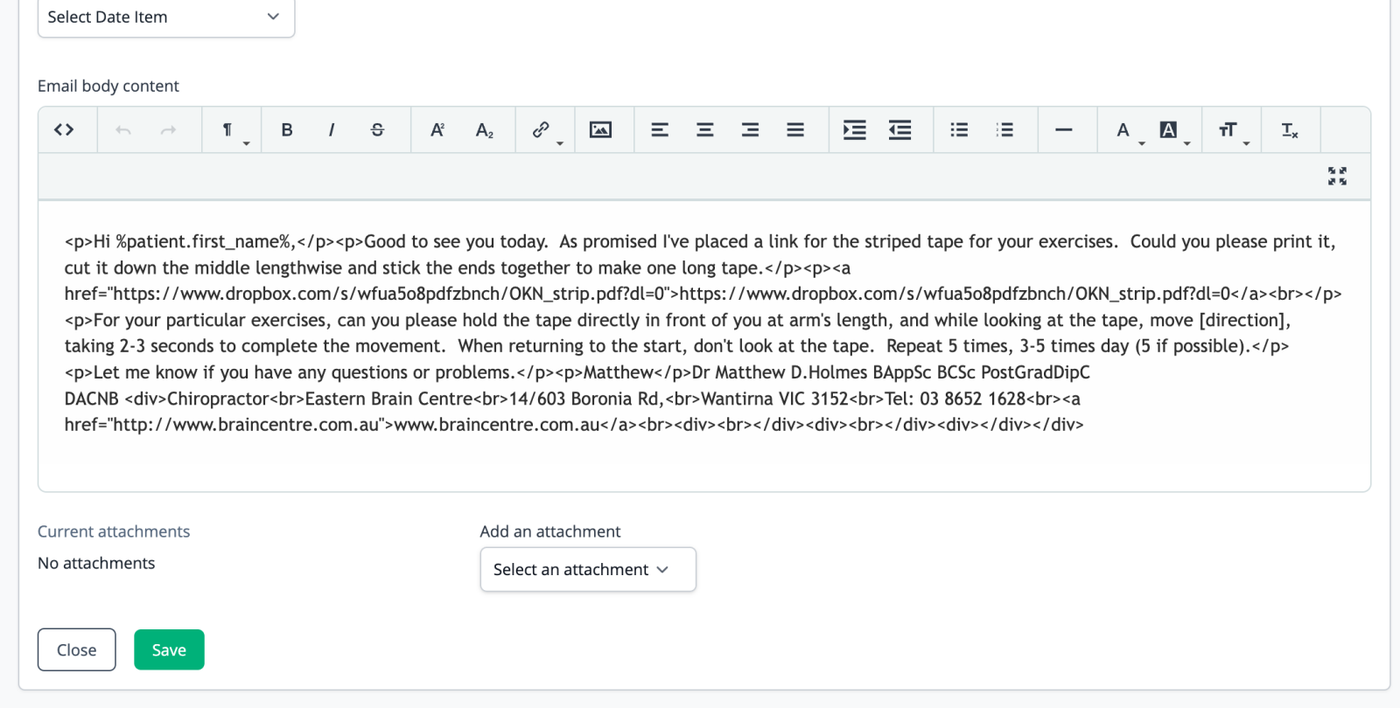
- Highlight and copy the content of the email body area.
- Click the "View HTML" button, circled in orange in the image below.
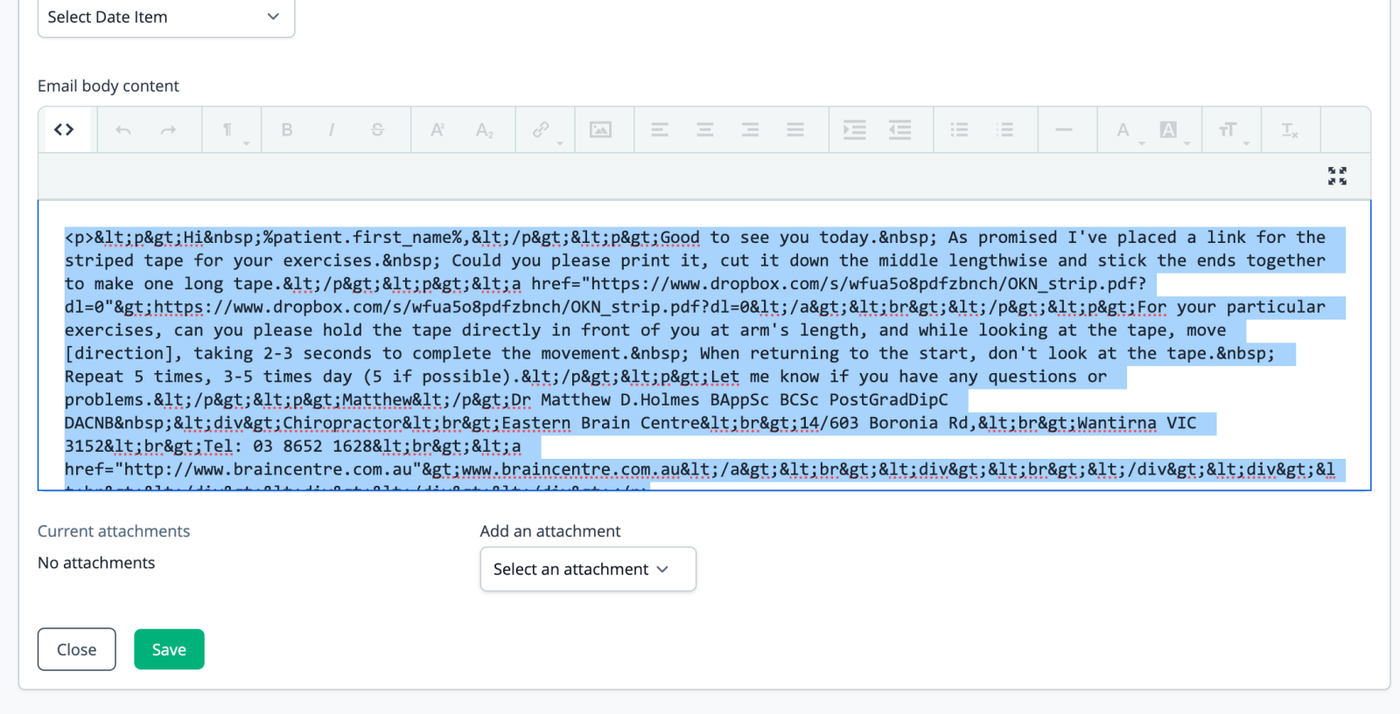
Then:
- Highlight the contents of the email body area as shown below.
- Delete it, then paste the copied content into the area.
Finally:
- Click the "View HTML" button again to return to the normal view. Your email should now display correctly as shown below. If so, you can now save the template.